Rainbow Birthday Party!

Birthday parties can be daunting and stressful (especially a birthday party for the newest member of your family!) To get ahead of that stressed-out feeling, I started planning Amelia's first birthday back in December. By the time the big day rolled around (in May), I felt in control, calm and grateful to my wonderful Husband, Amelia's Godmother, Caitlyn, her fantastic husband Jeremy, my cousin Clark and his beautiful girlfriend Paulina for all their help in making this day unforgettable!
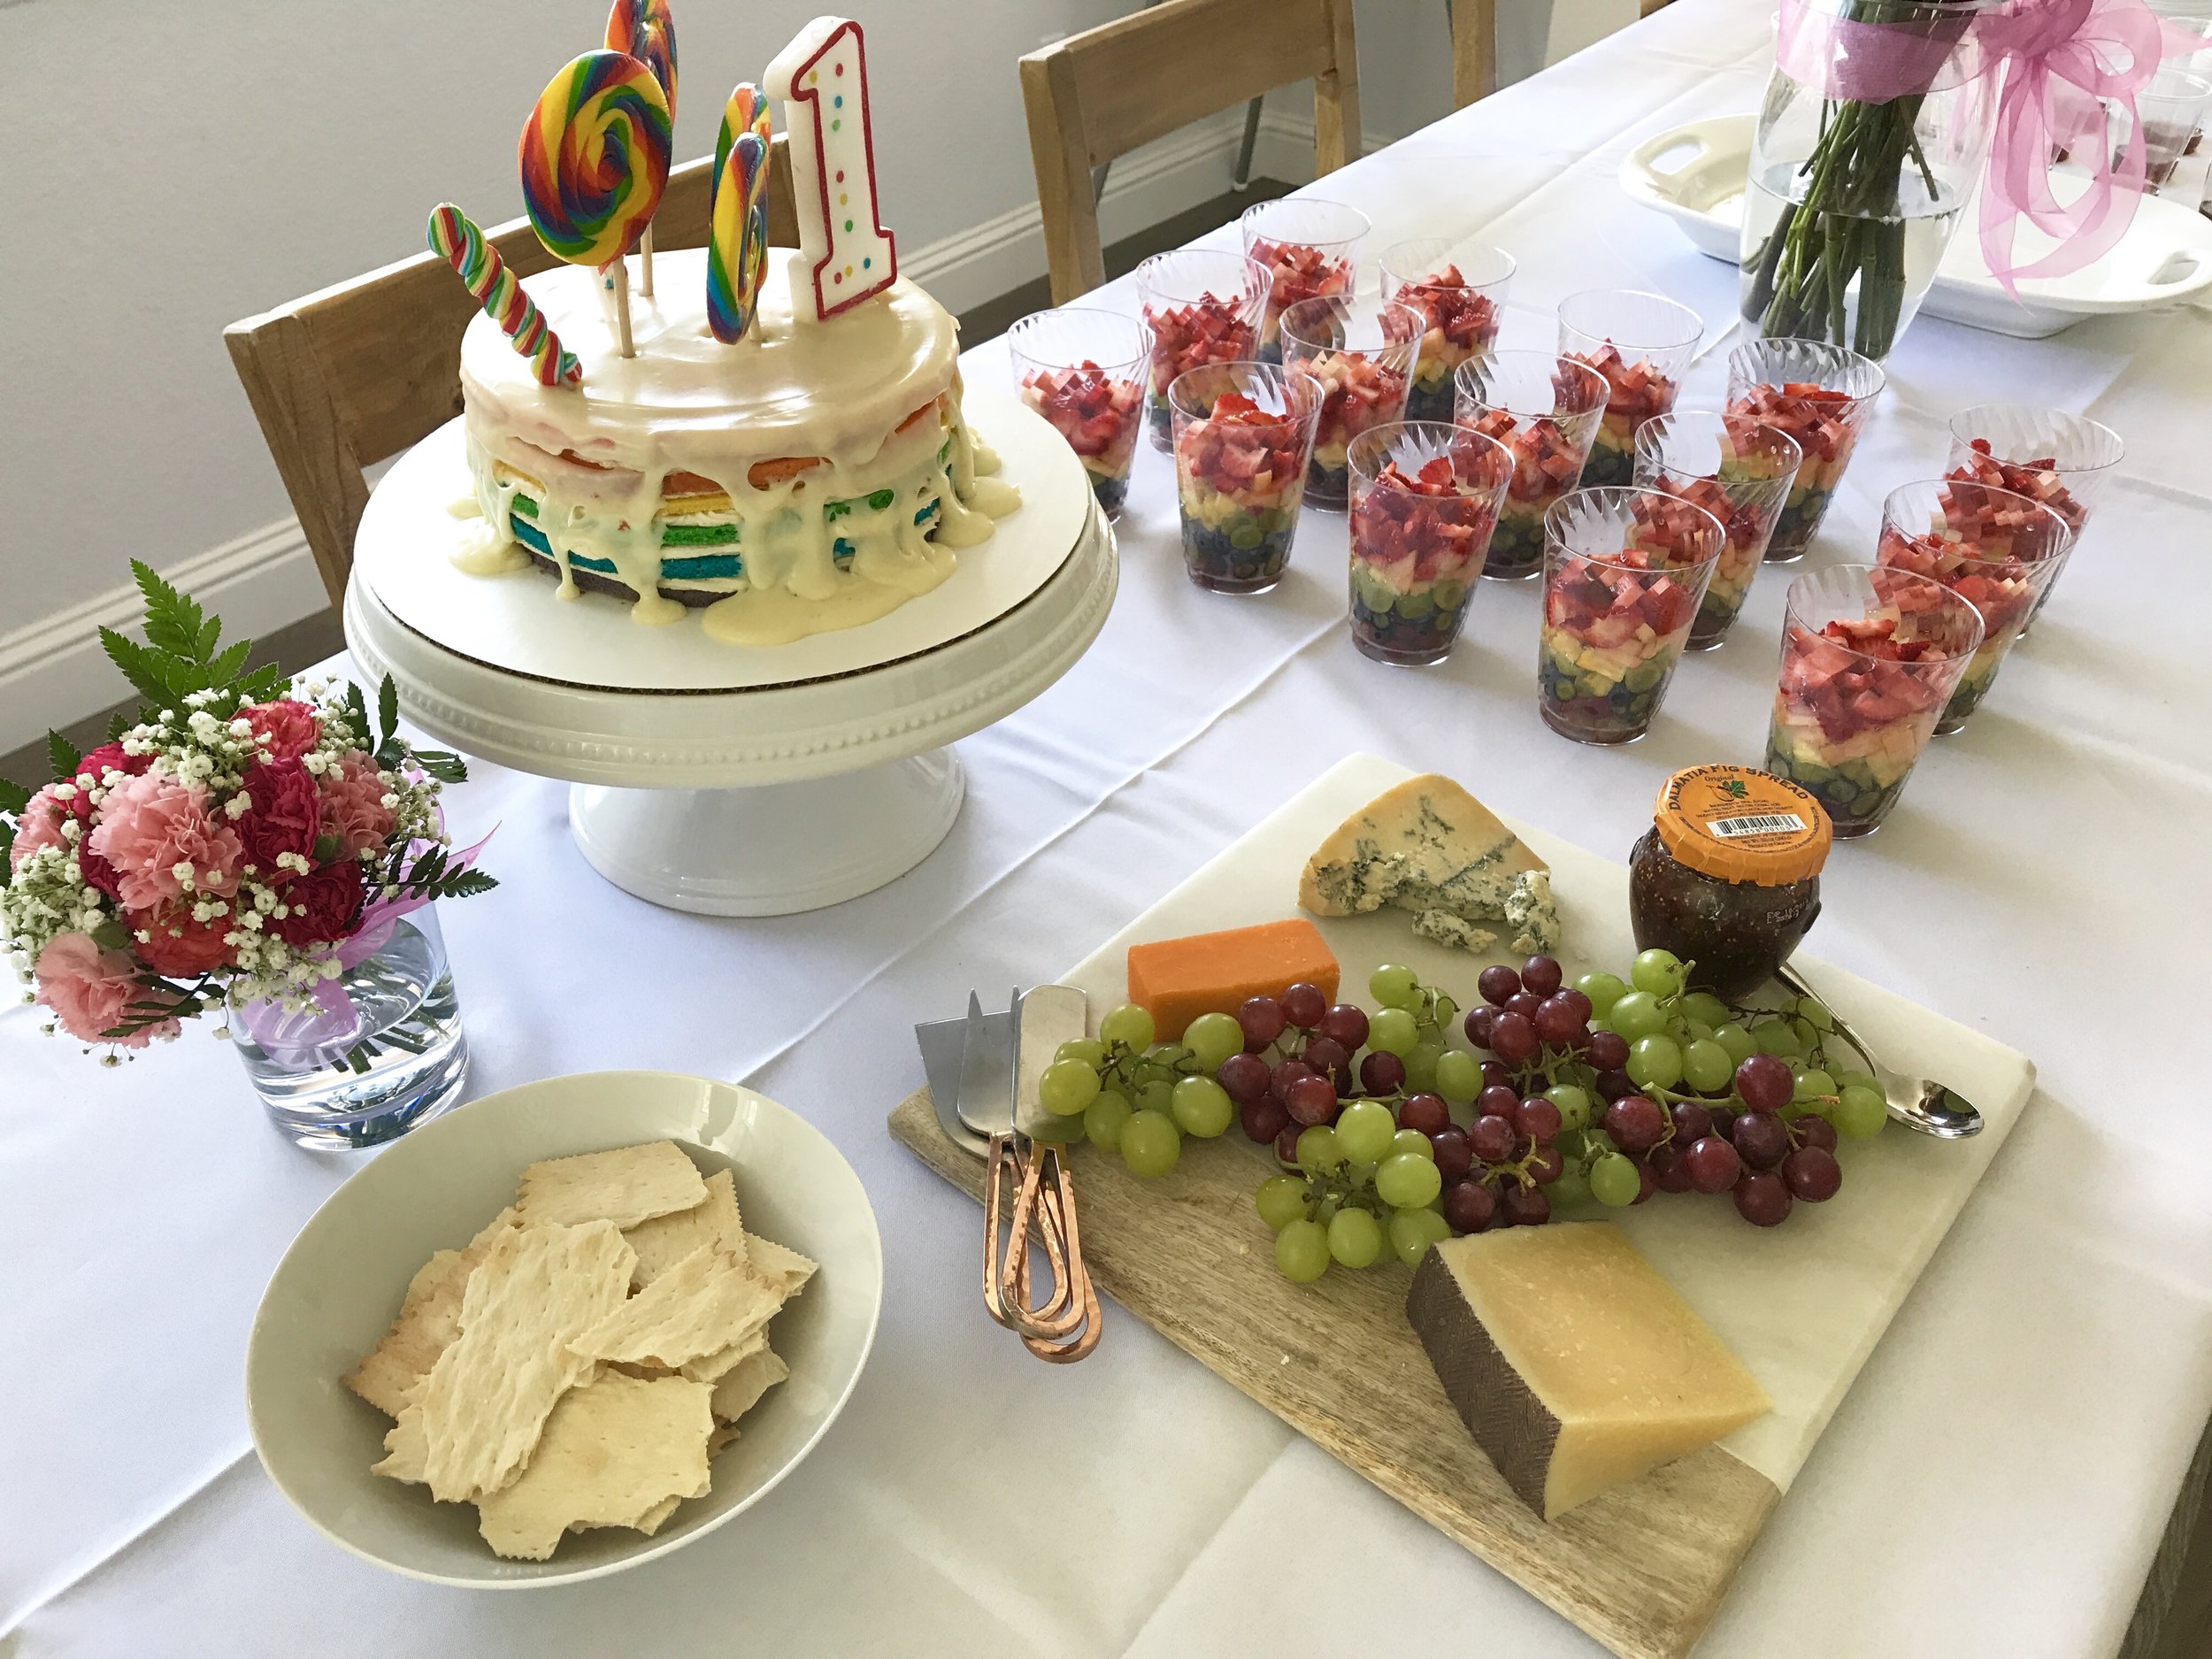
The Cake

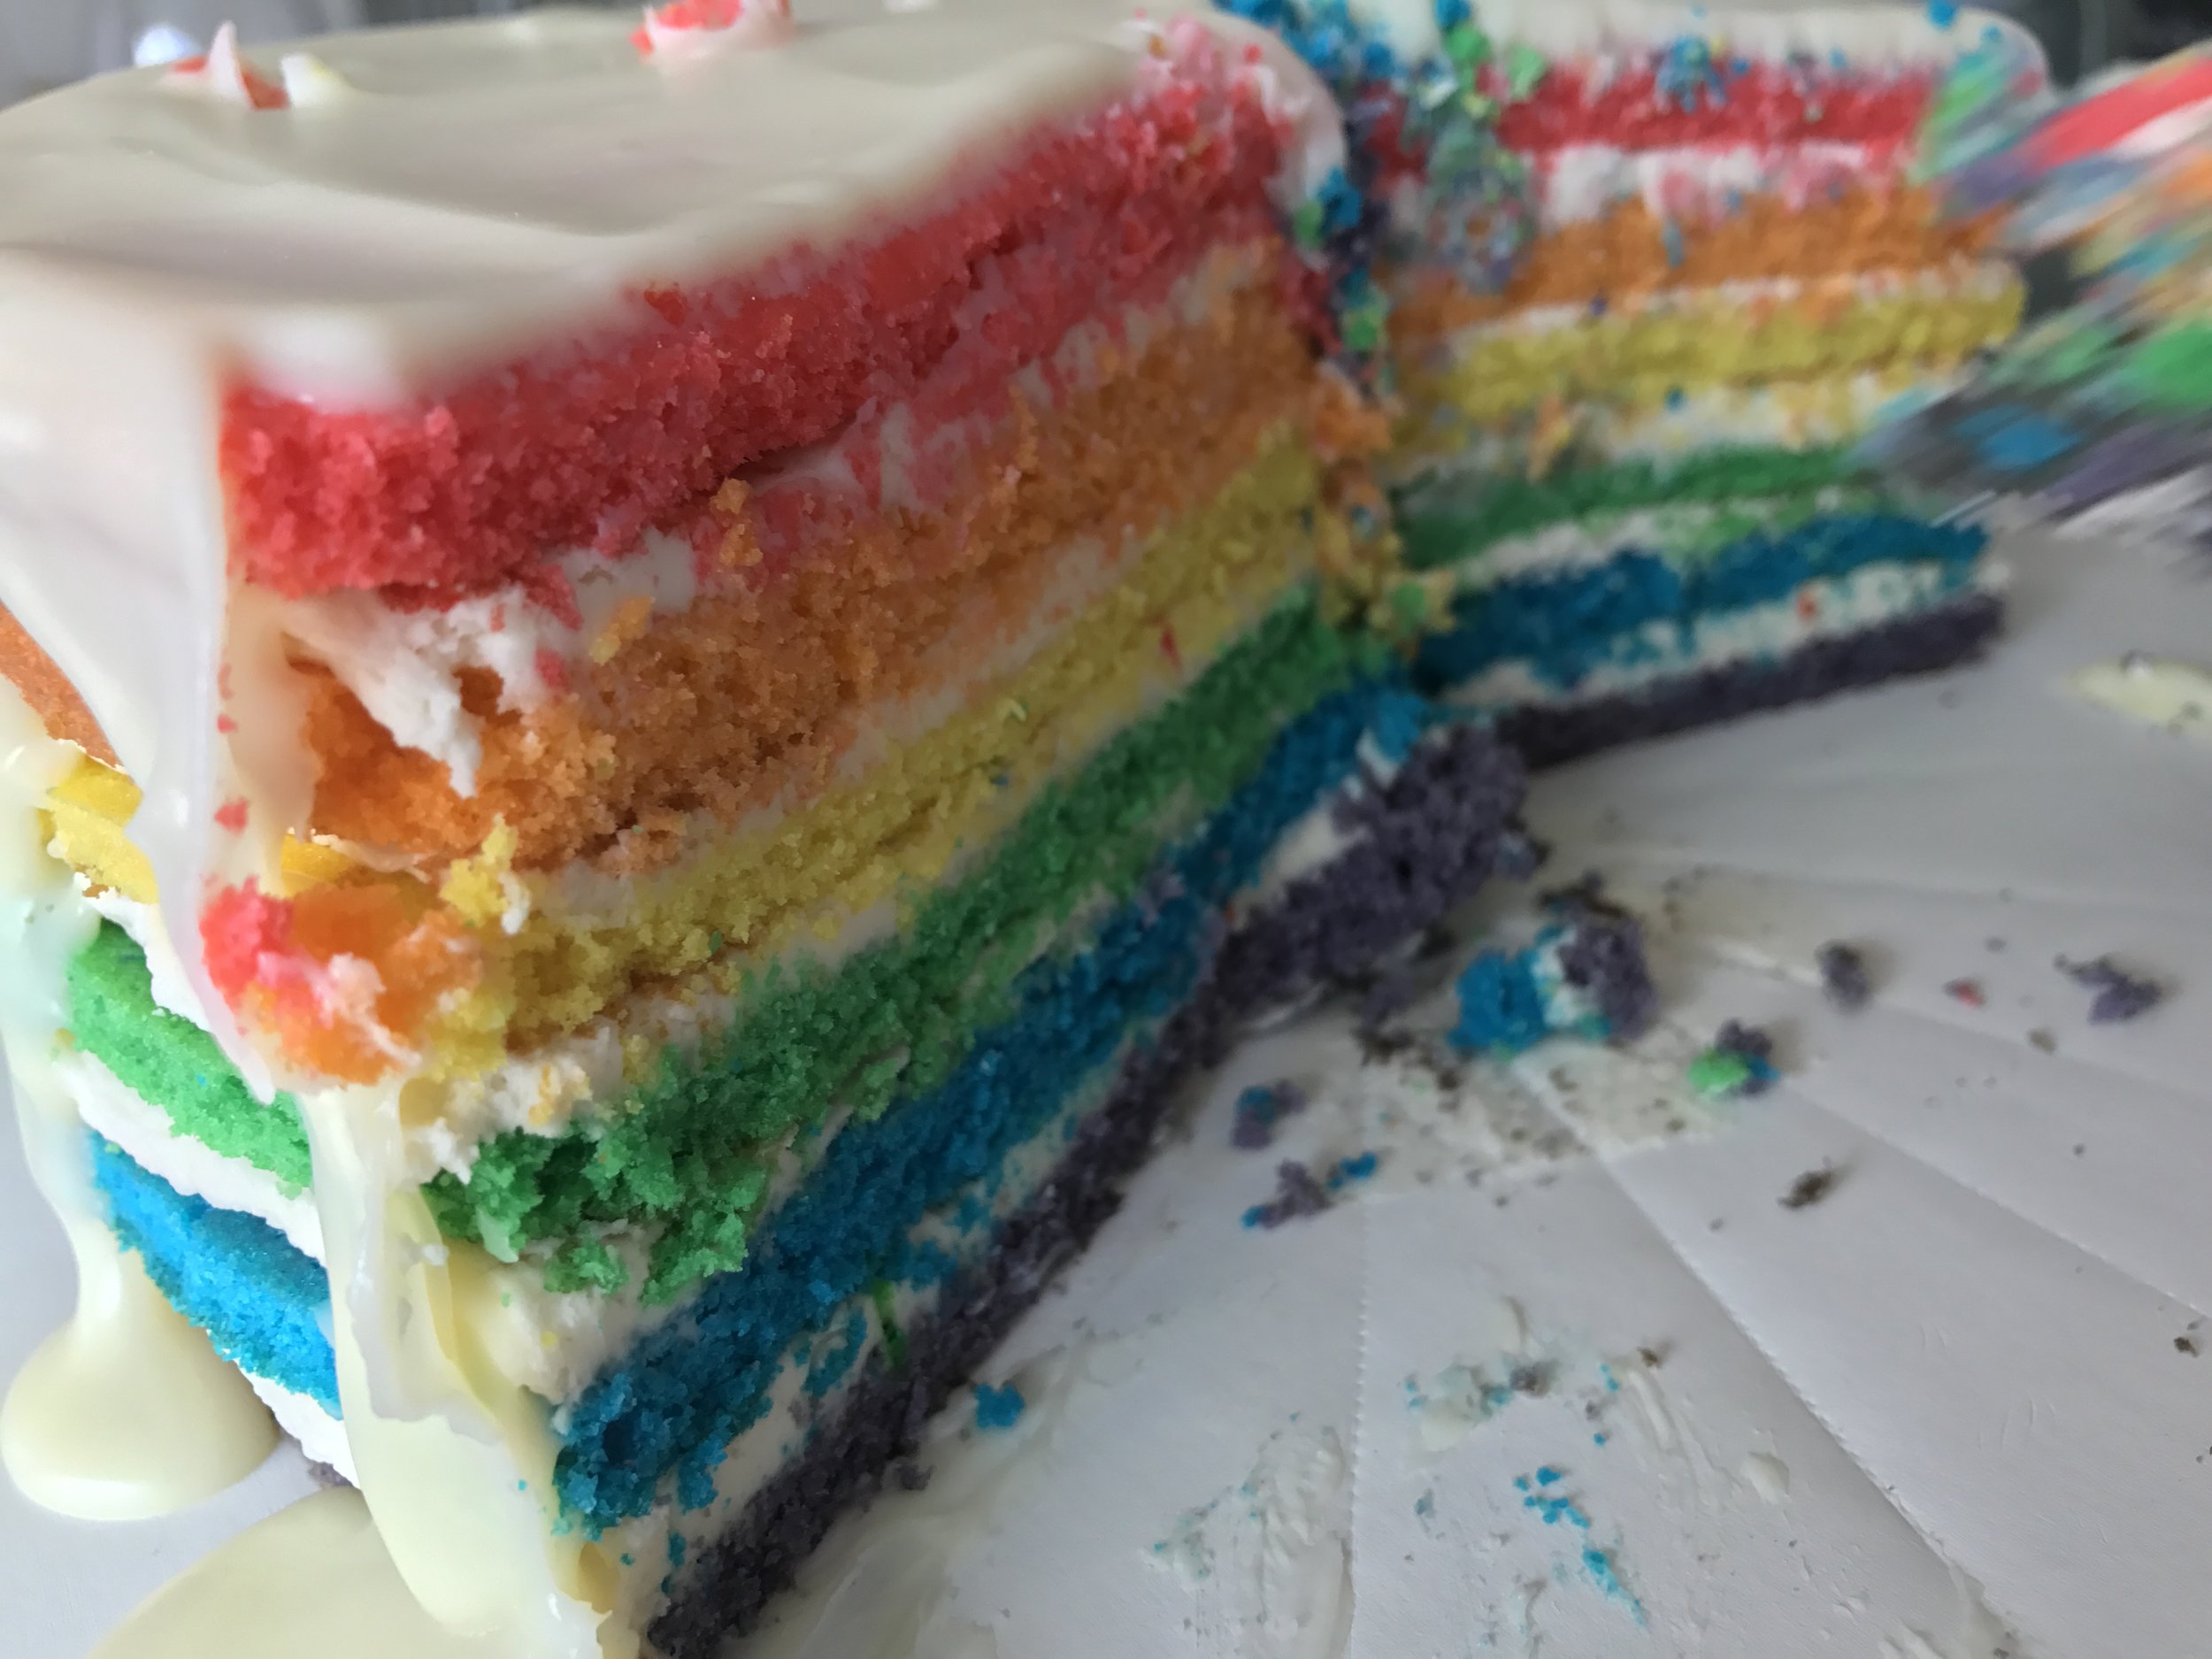

I am so pleased with how Amelia's birthday cake turned out! I used this recipe for a simple white cake and then, also check out this recipe from Jen Reviews for more ideas!
Divided the cake batter equally between 6 bowls
Added food coloring for each color (I really guessed on the amount of food coloring. I added 2 - 3 drops at a time until I reached my desired color)
Sprayed 3 9" circular pans and poured 3 of the colors into each
Since these cakes were extremely thin, I only allowed them to bake for a max of 7-8 minutes. I checked on them once or twice throughout the cooking process just to make sure they weren't burning. Using a toothpick, I inserted it into the middle of the cake to check for all overdone-ness.
I removed the three pans from the oven and allowed them to cool. Then, I cut a square of parchment paper and placed it on top of a plate. Being extremely careful, I placed the wax paper / plate upside down on top of the cake pan. I then flipped the pan upside down and gently shook so the cake was released. There were a couple of times when I had to use a spatula and gently circle around the cake in the pan so it would release.
I placed each layer's plates in the fridge to cool.
I then continued with the remaining 3 colors and followed the same process.
For the icing I used this simple butter cream frosting. I decided to only frost between the layers so you could see the rainbow colors clearly from the outside.
To make the white chocolate drip, I followed this recipe for a white chocolate ganache. Ganache is so incredibly easy to make! You just need patience and perseverance!
To top everything off, I added a couple of show-stopping lollipops that I picked up from Amazon! TADA!
You can absolutely make this cake. Although it looks rather complex, it really only added an additional 30 minutes to the baking and decorating time.
The Food


Recipe Information
Full English Breakfast Cups
I think we will absolutely be making this recipe again! It's a bit more complicated, but was a huge, huge hit with everyone!
Proper Tasty - Full English Breakfast Cups
French Toast Dippers
Super easy recipe for this tasty and cute treat! Simply prepare French toast as you normally would. Cut into "soldiers" (or strips) and set aside. In several clear plastic cups (or whatever you have on hand!) pour about 1/4 cup of maple syrup into the bottom. Then, take 3 or 4 of your soldiers and place them sitting in the syrup! These guys make such an awesome display!
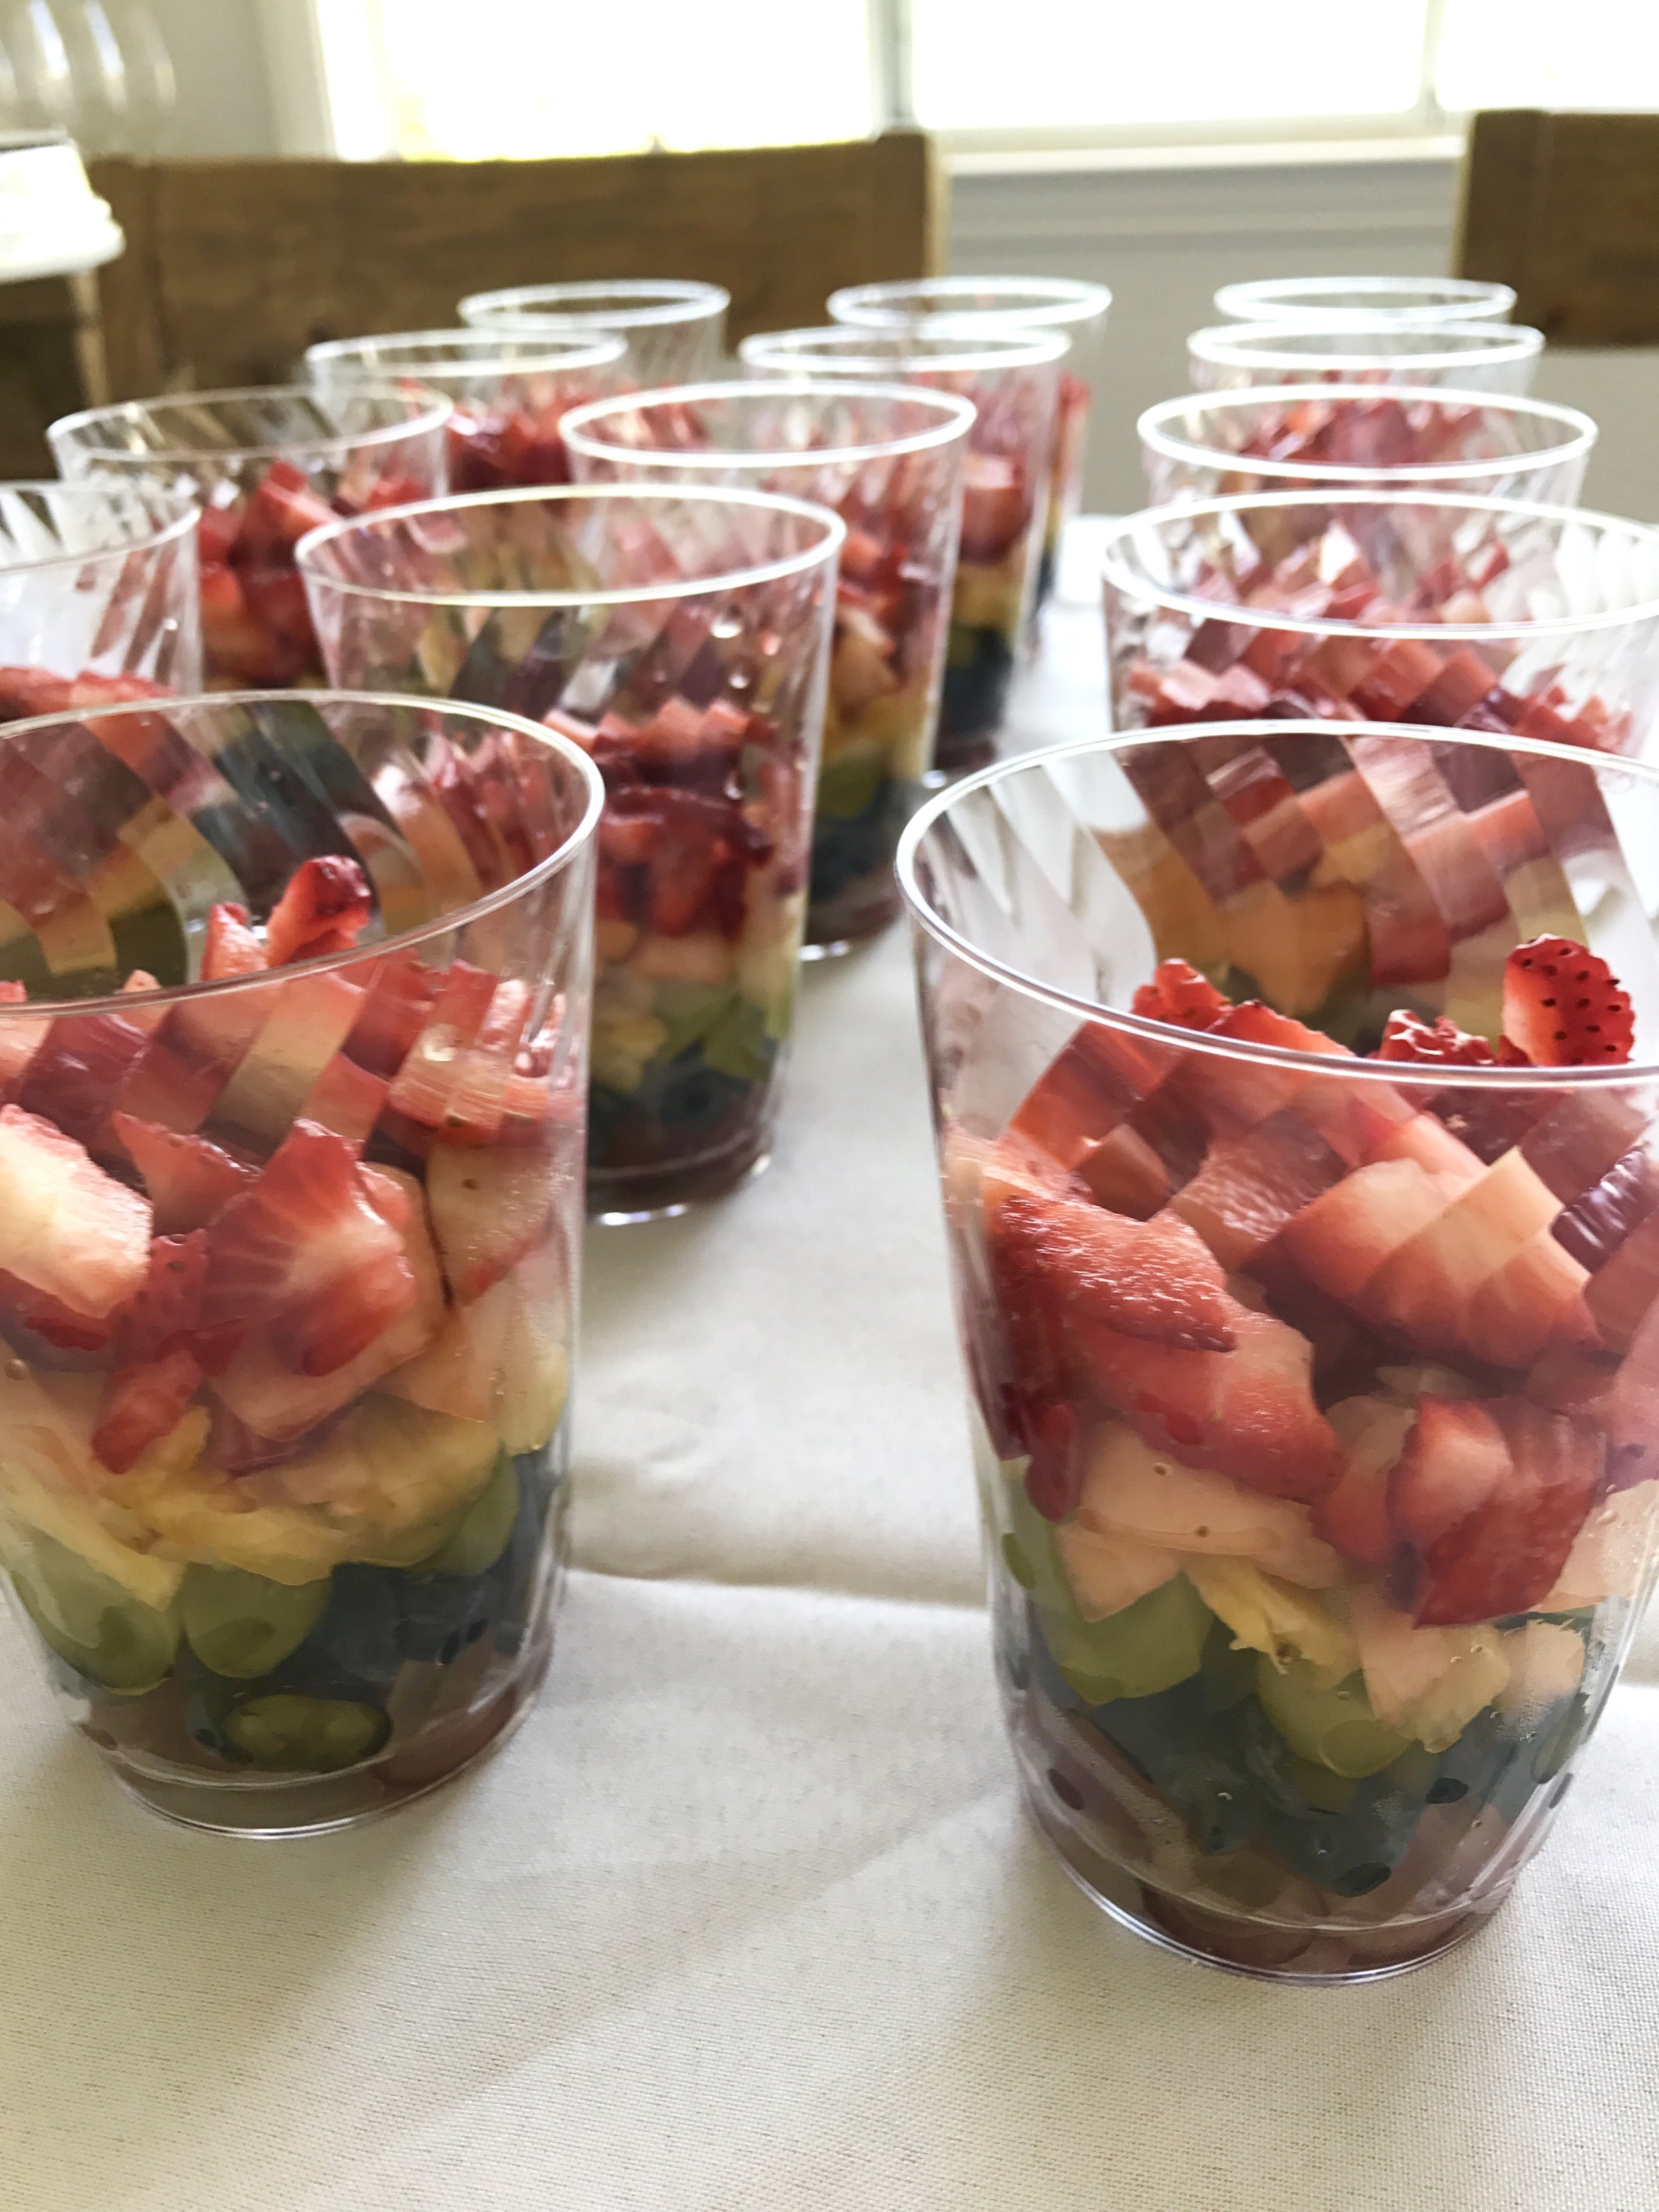
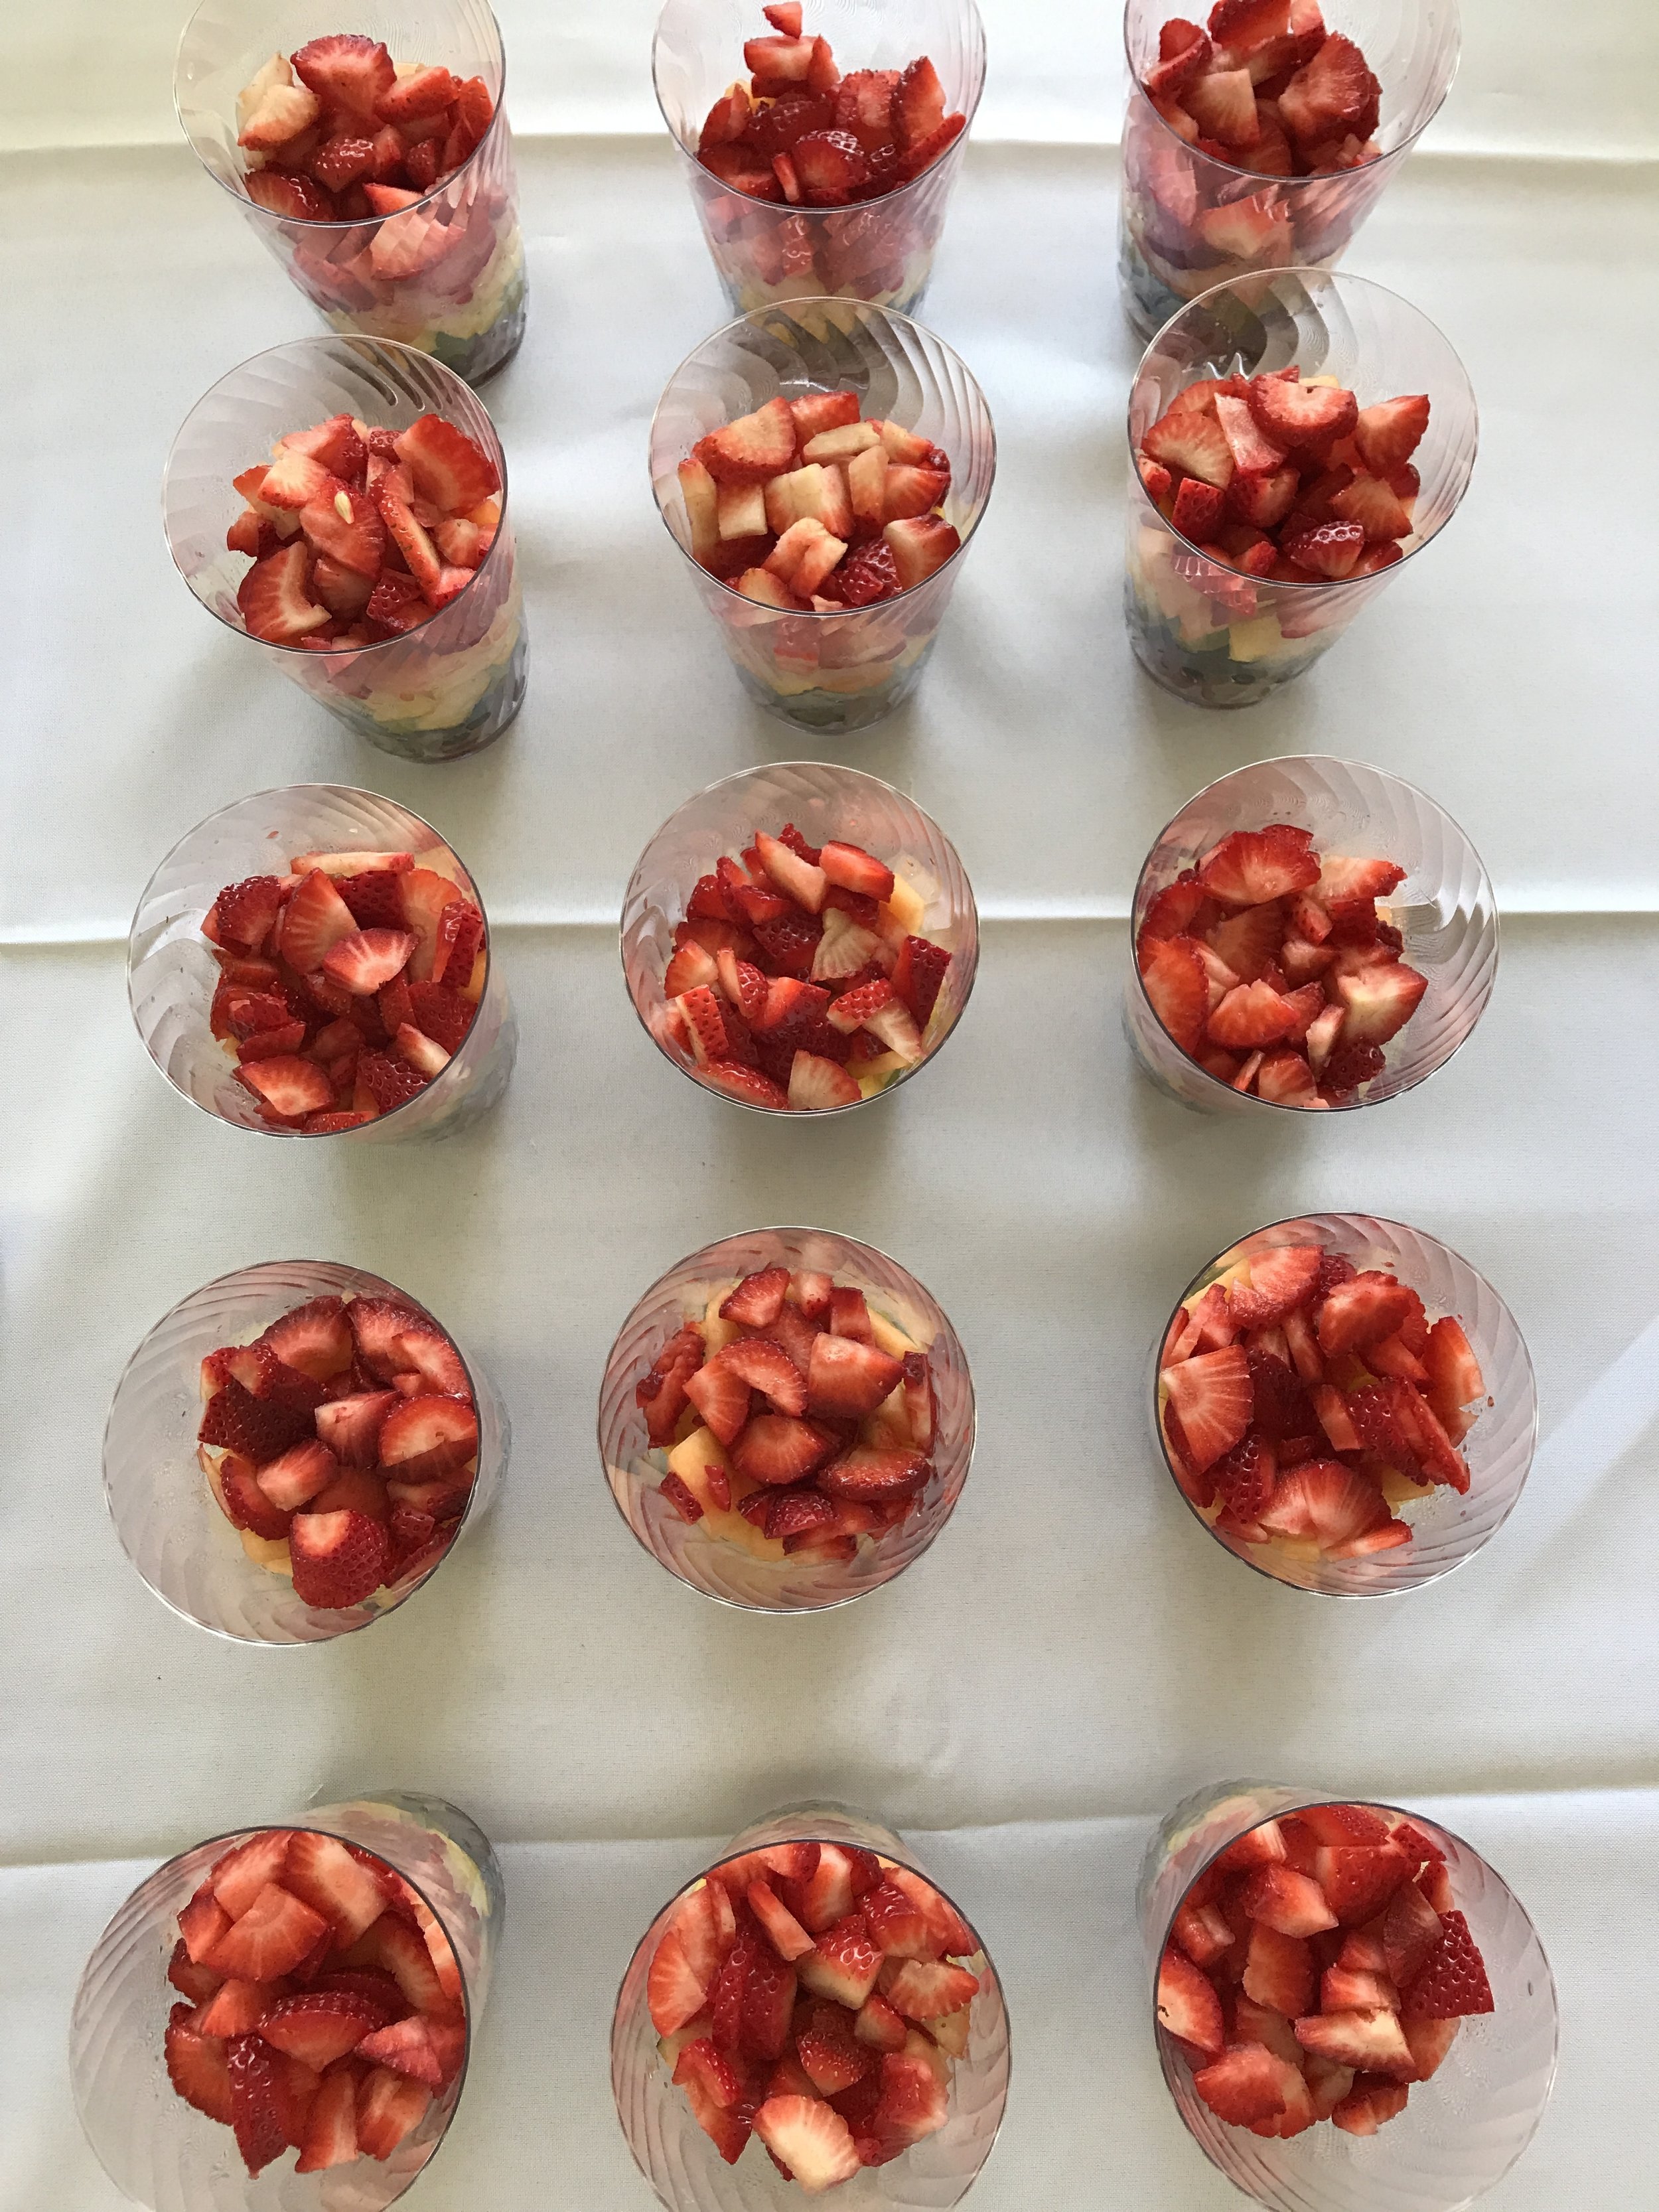
Rainbow Fruit Cups
Another simple and festive recipe! Simply take fruit in the colors of your choosing and get chopping! For this event we used:
Purple grapes
Blueberries
Green grapes
Pineapple
Pink melon
Strawberries
Taking clear plastic cups (or whatever you have on hand) cut up all ingredients and then start layering them into cups. We (our good friend Jeremy!) chopped up all the fruit so it was easy to use with little hands and non-choking hazards! These guys turned out wonderfully!
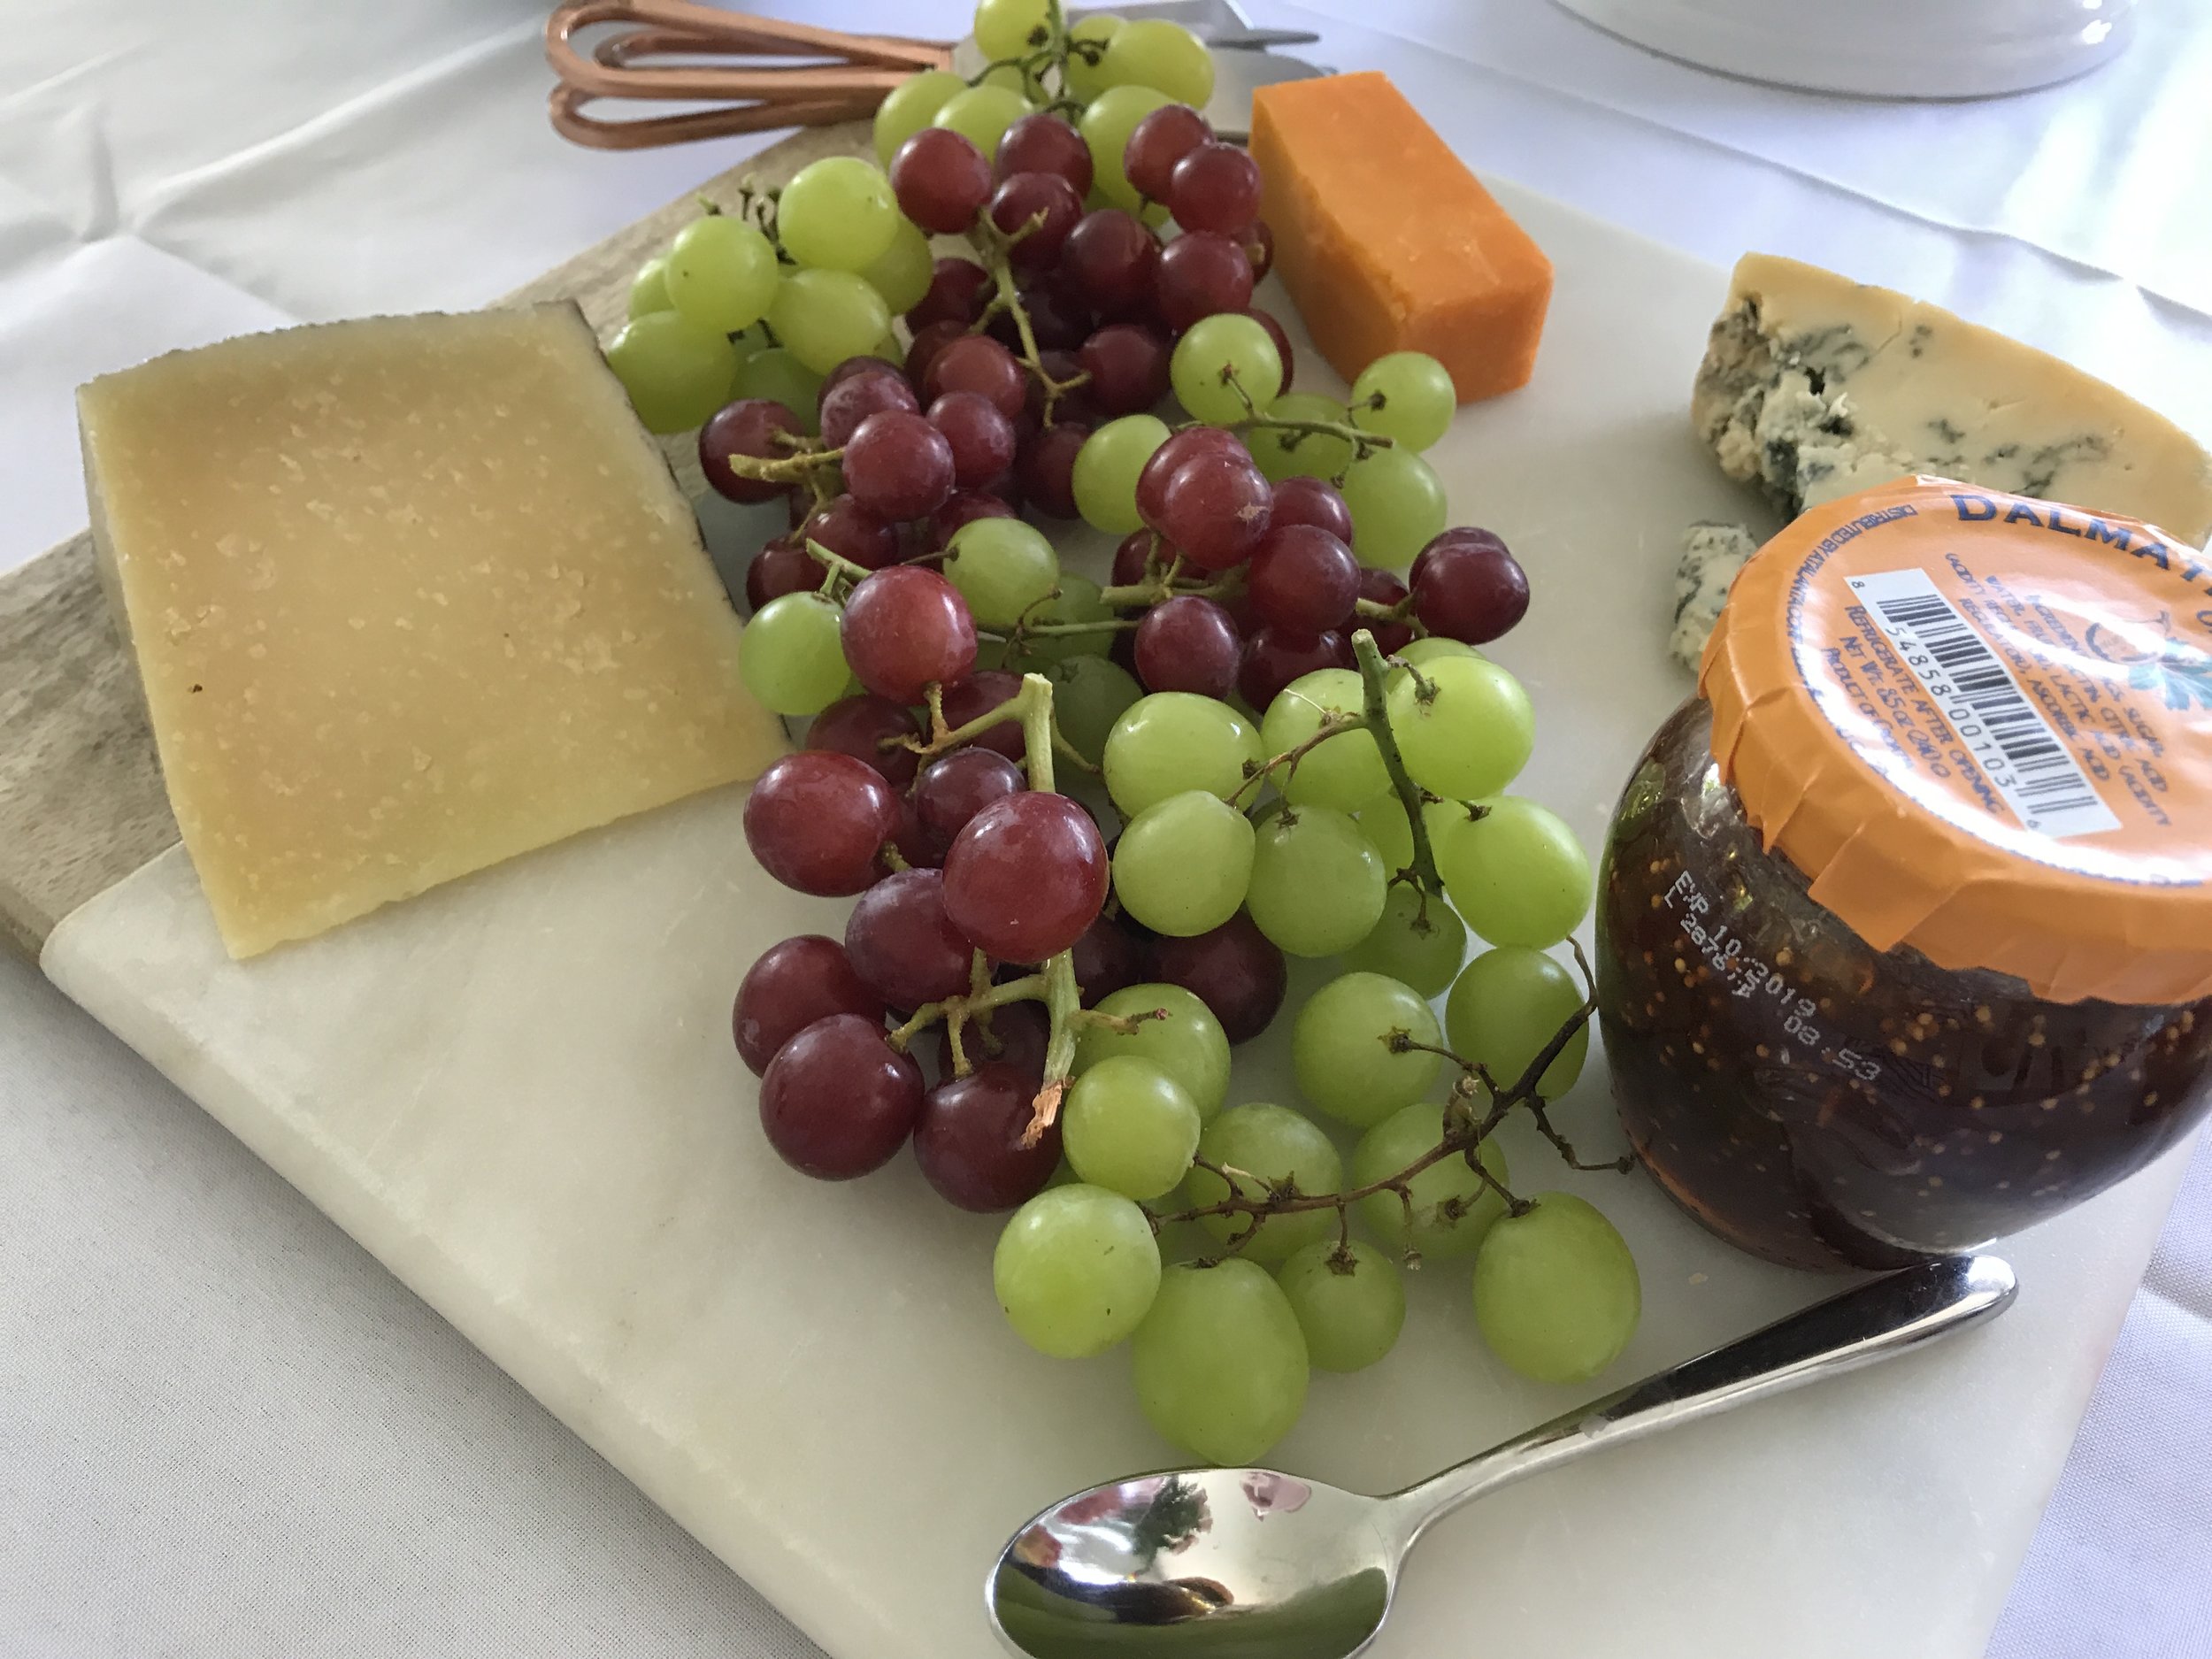
Cheeseboard
We always have a cheese board. Doesn't matter the occasion, they are literally always appropriate!
They are incredibly easy to put together as well! Simply gather:
A small selection of your favorite cheeses
1 or 2 different flavors of jam or fruit puree
Some odds and ends: Maybe some nuts, dried fruit, fresh fruit, dark chocolate etc.
Crackers or bread
That's all you really need to make a delicious cheeseboard!
Treat Bags
If you're thinking "Maybe she went a bit overboard with the treat bags?" you would be (maybe?) right. The thing is, the treat bags came together so organically, it was hard to stop myself. Each child at the party received:
I placed all items in this clear goodie bag, and tied it off with a fun rainbow ribbon! I made the gift tags on Adobe Illustrator using a simple rainbow border and 'chalkboard' type. I then laminated all the gift tags so they wouldn't easily tear once the kiddos got their hands on it!
Birthday parties don't need to be this elaborate, especially for kids. But, if you're like me and enjoy the planning and creativity involved, it becomes a fun, fantastic way to spend some time! Just remember, the odds of your kids remembering this kind of birthday event are slim. They won't remember the cake, or the ribbons or bows. They will remember how they felt that day, if they had a good time, who they were excited to spend time with and the fun they had running around. If you always keep that perspective in mind when it comes to kid's parties, you can never ever go wrong.
I would love to hear about how you plan for your special person's birthday and parties!? Do you love to plan and get creative? Do you prefer to just keep it-low key? Comment below, on Facebook or Instagram and let me know!
Yours in celebration (we made it 1 year!)
Lauren
